
Use this guide to choose a solar-powered battery generator, connect compatible panels, and power selected devices safely. It is for beginners preparing backup power for home essentials, travel, or outdoor use. Allow 1–3 hours for planning, setup, and checks; a full solar charge may take longer depending on sunlight, panel size, and battery capacity.

Get backup power and energy gear delivered free with Prime
- Fast, free delivery on millions of items
- Prime Video, Amazon Music and more included
- Member-only deals all year
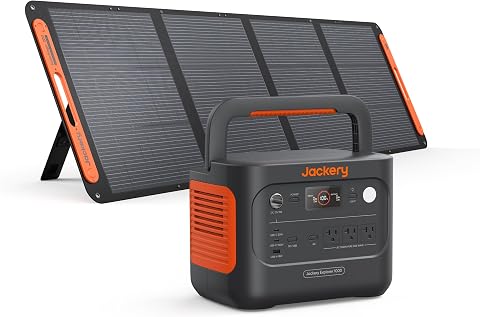
Jackery Solar Generator 1000 v2 and 200W Solar Panel, 1070Wh, 1500W AC
- ✔ Battery capacity: 1,070Wh
- ✔ Rated AC output: 1,500W
- ✔ AC surge peak: 3,000W
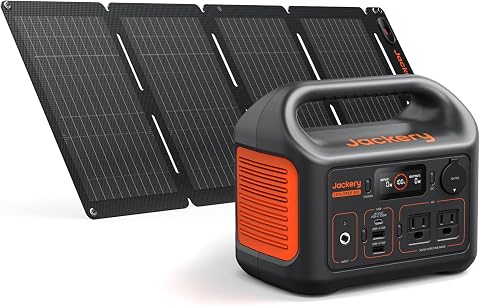
Jackery Solar Generator 300 and 40W Solar Panel, 292Wh, 300W AC
- ✔ Battery capacity: 292Wh
- ✔ Rated output: 300W
- ✔ Peak surge: 600W

Jackery Explorer 300 Portable Power Station, 292Wh
- ✔ Battery capacity: 292Wh
- ✔ Rated output: 300W
- ✔ Peak surge: 600W
Difficulty: Beginner | Time: 1–3 hours for setup and an initial solar charge; charging time varies
What You’ll Need
Tools & Materials:
- Solar-powered battery generator, also called a portable power station
- Compatible solar panels and the manufacturer-approved connecting cable
- Device chargers or power cords
- Device labels or manuals showing watts and charging needs
- Notebook or phone calculator for estimating power use
Knowledge:
- Basic use of electrical devices and power cords
- Ability to read wattage and voltage information on device labels
Check the power station and panel manuals before connecting anything. Confirm that the panel’s connector, voltage, and current fall within the station’s solar input limits. Keep the station dry and ventilated, and use it only within the temperature range specified by its manufacturer.
Jackery Solar Generator 1000 v2 and 200W Solar Panel, 1070Wh, 1500W AC
For buyers who want one solar setup to cover both everyday electronics and more substantial backup loads, the Solar Generator 1000 v2 is the clear step up from the two Explorer 300 options. Its 1,070Wh battery and 1,500W AC output give it substantially more headroom for appliances such as a fridge or electric pot, subject to their power requirements. The 3,000W surge rating can accommodate brief startup demands, though it does not mean the station can sustain that output.The included 200W solar panel is also better matched to replenishing a large battery than the 40W panel bundled with the smaller 300. Jackery says the 1000 v2 can reach 80% in about six hours with that panel, while the 300 with its included panel takes about 7.5 hours to reach 80% of a much smaller capacity. Sunlight and panel conditions affect real charging, but the difference in panel size matters when we need to recover energy during a limited daylight window.There are real compromises. At 23.8 pounds, this unit is far heavier than the 7.5-pound Explorer 300 described in the product information, so it is better for a vehicle, campsite, or home backup area than long hikes. Its one-hour AC charging requires enabling emergency charging in the app; the default mode is slower to support battery health. Choose it for capacity and appliance flexibility, and skip it if pack weight or a small electronics-only kit matters more.
Pros:
- 1,070Wh capacity provides much more stored energy than either 292Wh Explorer 300.
- 1,500W rated AC output supports a broader range of appliances than the 300W models.
- 200W solar panel is included and is larger than the 40W panel in the compact bundle.
- LFP battery is specified for 4,000 cycles to 70% capacity.
Cons:
- At 23.8 pounds, the station is less suitable for carrying over long distances.
- One-hour charging requires turning on emergency charging in the app; normal default charging is slower.
- The panel and station may ship separately, so the complete kit may not arrive together.
Best for: Campers, road trippers, and households seeking a higher-capacity solar bundle for electronics and selected mid-size appliances.
Not ideal for: Hikers who prioritize low carry weight, or buyers who only need to recharge phones, cameras, and a laptop.
Bottom line: We rank the 1000 v2 first because its capacity, output, and included 200W panel make it the most capable all-round solar setup in this comparison, provided its added weight is acceptable.
“We rank the 1000 v2 first because its capacity, output, and included 200W panel make it the most capable all-round solar setup in this comparison, provided its added weight is acceptable.”
Jackery Solar Generator 300 and 40W Solar Panel, 292Wh, 300W AC
When portability and a ready-to-use solar kit matter more than running appliances, the Solar Generator 300 with 40W panel is the most straightforward compact pick. The station provides 292Wh of capacity and 300W rated output, enough for a mix of small electronics such as cameras, drones, and laptops within their power limits. Two AC outlets plus USB and car outputs make it easier to charge several kinds of devices than relying on a single charging port.Compared with the 1000 v2, this setup is dramatically smaller in capacity and output, so it is not the better choice for a fridge or other substantial appliance. Its advantage over the Explorer 300 listing is that the 40W panel is included: we can begin solar charging without sourcing a separate panel. The tradeoff is charging pace. Jackery estimates about 7.5 hours to reach 80% with that panel, so it is more suited to topping up a modest device load across a sunny day than quickly recovering a depleted station.The product description calls the unit 7.5 pounds, while the supplied specification block lists 12.9 pounds; that inconsistency makes it difficult to judge carry weight confidently from the listing alone. Either way, it remains a small-capacity option compared with the 1000 v2. Choose this bundle if we want a compact station and panel together; buyers who already own a suitable panel may prefer the station-only Explorer 300 instead.
Pros:
- 40W solar panel is included, unlike the station-only Explorer 300.
- 292Wh battery and 300W output suit many personal electronics and small loads.
- Includes AC, USB-C, USB-A, and 120W car charging outputs.
- LFP chemistry is specified for over 4,000 cycles before reaching 70% capacity.
Cons:
- 40W panel is slow for refilling the battery, with about 7.5 hours stated to reach 80%.
- 300W rated output excludes many larger appliances that the 1000 v2 can handle.
- Listing weight is inconsistent: the description says 7.5 lb while specs say 12.9 lb.
Best for: Campers and travelers who want a small battery station with a solar panel included for recharging personal electronics.
Not ideal for: People who need to power household appliances, store energy for extended outages, or recharge quickly from a small panel.
Bottom line: We recommend this bundle over the station-only 300 when an included panel matters, while recognizing that its solar input and battery are designed for light-duty use.
“We recommend this bundle over the station-only 300 when an included panel matters, while recognizing that its solar input and battery are designed for light-duty use.”
Jackery Explorer 300 Portable Power Station, 292Wh
The Explorer 300 station-only listing gives us the same basic 292Wh, 300W class as the solar bundle above, but does not include a solar panel. That distinction is the point: if we already own a compatible panel or want to choose a different size, this option avoids bundling the specific 40W panel. The supplied description says a 100W panel can bring the station to 80% in approximately 2.8 hours, compared with about 7.5 hours using the bundle’s 40W panel.For light travel, that small format can be more practical than the 1000 v2. It is described as weighing 7.5 pounds and offers USB-C, USB-A, car, and two AC outlets for small devices. But the capacity and 300W output remain the same limitations as the other Explorer 300: it cannot match the 1000 v2 for appliance support or energy reserve. We should size the battery to our expected load rather than assume a solar panel makes a small station equivalent to a larger one.Because the panel is optional, this is not a complete solar generator kit on its own. Buyers without a panel need to account for that separate purchase and compatibility; those who want a ready-made pairing should choose the Solar Generator 300 bundle. This listing is the more flexible starting point for existing solar owners, but less convenient for first-time buyers assembling a kit.
Pros:
- Compact 292Wh capacity and 300W output handle many small electronics.
- Panel choice remains flexible, with the description citing an 80% charge in about 2.8 hours using a 100W panel.
- Two AC outlets and several USB and car charging outputs support mixed devices.
- LFP battery is specified for more than 4,000 cycles before reaching 70% capacity.
Cons:
- No solar panel is included, unlike the bundled Solar Generator 300.
- 300W rated output and 292Wh capacity are limited for appliance backup.
- The listing gives conflicting weight figures: 7.1 lb in specs and 7.5 lb in the description.
Best for: Buyers who already have a compatible solar panel or want to select a separate panel to fit their charging routine.
Not ideal for: First-time solar generator buyers who want a complete panel-and-station package, or anyone seeking backup for larger appliances.
Bottom line: We would choose this Explorer 300 when we already have a panel or want to specify one ourselves; for a complete compact solar kit, the bundled 300 is simpler.
“We would choose this Explorer 300 when we already have a panel or want to specify one ourselves; for a complete compact solar kit, the bundled 300 is simpler.”
As an Amazon Associate we earn from qualifying purchases.
Before You Start
List the devices you want to run and identify their wattage. Add the watts for devices you may use at the same time, then compare that total with the station’s continuous AC output rating. A device with a motor, compressor, or heating element can briefly draw more power at startup, so check its manual or label for startup requirements.
Battery capacity is usually shown in watt-hours (Wh). To estimate runtime, divide usable battery capacity by the devices’ combined wattage. For example, a 500 Wh station powering a 50 W device may run it for less than 10 hours because conversion losses and battery reserves reduce usable energy. Treat estimates as planning guidance, not a guarantee.
Do not connect the station to household wiring or a wall outlet to feed power back into your home. Use its built-in outlets as directed. If you need to power home circuits, use equipment and installation approved for that purpose and have a qualified electrician handle the connection.
Step-by-Step Instructions
Step 1: Choose a station for your devices
Compare the station’s usable capacity in watt-hours with the energy your devices need. For each device, multiply its watts by the number of hours you expect to use it, then add the results. Choose a station with enough capacity for that total and enough continuous output watts to run the devices at the same time. Check its surge rating against appliances that draw extra power at startup.
Review the output ports as well. Match the station’s AC outlets, USB ports, or DC ports to the devices you plan to connect. Confirm that the ports provide the required voltage and charging rate.
Tip: Capacity describes stored energy; output describes how much power the station can supply at once. A large capacity does not automatically mean it can run a high-wattage appliance.
Check: The station’s port types, continuous output, surge capacity, and usable watt-hours fit your planned devices and run time.
Step 2: Check the station and panel specifications
Read both manuals and locate the station’s allowed solar input voltage and current range, maximum solar input watts, and connector type. Compare those figures with the panel’s output specifications. Use panels and cables that the station manufacturer lists as compatible, or confirm that every electrical rating and connector matches its stated limits.
Inspect the station, panels, and cables for cracked housings, damaged insulation, bent pins, or loose connectors. Do not use damaged equipment. Keep all plugs disconnected while inspecting.
Tip: Never assume that a plug fits safely just because it can be inserted. A mismatched voltage, polarity, or connector can damage equipment.
Check: You have confirmed the panel’s output and connector are within the station’s solar input limits, and the equipment has no visible damage.
Step 3: Place the station in a safe location
Set the station on a stable, dry surface with the ventilation openings clear. Keep it away from rain, standing water, direct heat, flammable materials, and enclosed spaces that trap heat. Follow the manual’s temperature limits. If you are using it outdoors, protect it from weather without blocking airflow.
Place it close enough to the devices and panel cable to avoid tension on the connectors, but keep cords arranged where people will not trip over them.
Tip: Portable power stations are not all weatherproof. A covered area does not make a unit safe from rain or condensation unless the manual says it is rated for those conditions.
Check: The station is level, dry, ventilated, protected from weather, and positioned so cables can reach without strain.
Step 4: Charge the station before relying on it
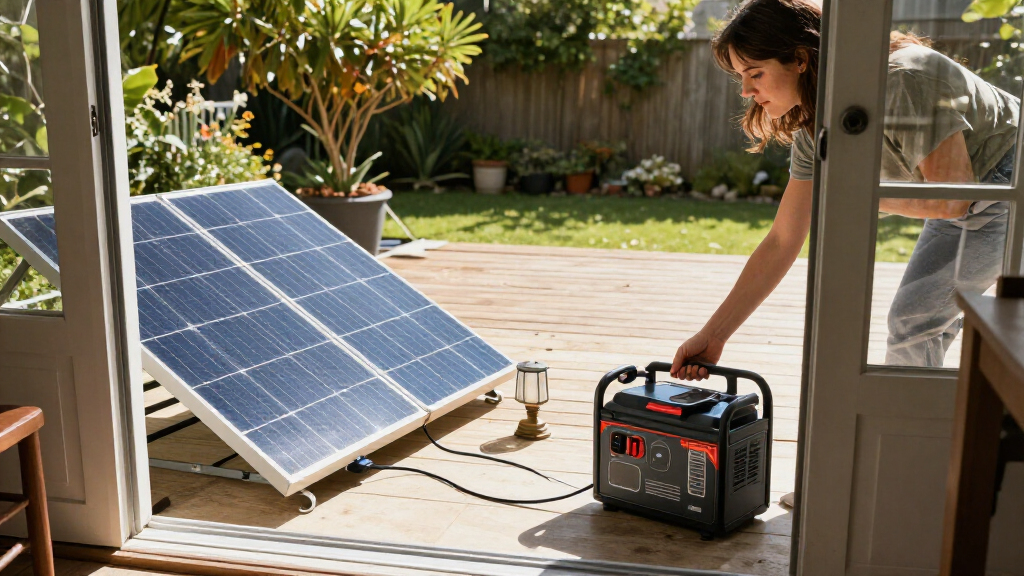
If the station has little charge, charge it using the method described in its manual, such as its approved wall charger or solar input. For solar charging, connect the compatible panel cable to the station’s solar input, then place and angle the panels according to their instructions. Keep the panels clear of shade and check that every connector is seated securely.
Turn on the station or activate solar input if the manual requires it. Check the screen or indicator for charging status, input watts, and battery percentage. Reposition the panels when sunlight changes or shade crosses them.
Tip: Charging time varies with battery size, panel output, sun angle, clouds, shade, and temperature. A panel’s rated wattage is a best-case figure, not a promise of constant input.
Check: The station shows solar input or an increasing charge level. If it shows no input, disconnect and troubleshoot before trying a different panel or cable.
Step 5: Connect devices within the output limits
Turn on the station’s output mode for the port you need, then connect one device. Use a matching AC, USB, or DC port and its appropriate cable. Check the display for output watts and confirm that the device starts and charges or runs normally.
Add other devices one at a time. Keep their combined load below the station’s continuous output rating and account for startup surges. Turn off a device or disconnect it if the station reports an overload, overheats, or shuts down.
Tip: AC output can use more battery energy than direct USB or DC output for the same device. When a device supports it, use a suitable direct port to reduce conversion losses.
Check: Each device operates normally, the station reports no overload or temperature warning, and the combined load stays within the rated output.
Step 6: Monitor use and recharge after operation
Check the battery level and output load while devices are running. Disconnect devices that are no longer needed to save energy. If the station approaches its low-battery warning, switch off nonessential loads and recharge it according to the manual.
After use, turn off the output ports, unplug devices, and disconnect solar panels in the order specified by the manufacturer. Store the station and panels clean and dry, and follow the manual’s advice for storage charge and periodic recharging.
Tip: Do not leave a depleted station stored for long periods unless its manual explicitly allows it. Battery storage guidance differs by model.
Check: The outputs are off, cables are disconnected without damage, and the station is stored at the charge level and conditions recommended by its manufacturer.
Common Mistakes to Avoid
- Choosing a station by battery capacity alone. — Check both watt-hours for run time and continuous output watts for the devices you will operate simultaneously; check surge output for motors and compressors.
- Connecting a panel without checking its electrical ratings. — Compare panel voltage, current, connector, and total input watts with the station’s solar input limits before plugging it in.
- Expecting the panel’s rated wattage throughout the day. — Allow for clouds, shade, temperature, and panel angle when estimating charge time, and monitor the station’s actual input reading.
- Using the station in a damp or poorly ventilated spot. — Keep the unit dry and leave its vents clear; follow the manufacturer’s weather and temperature limits.
Troubleshooting
Problem: The station shows no solar input.
Solution: Check that the panel is in direct sunlight, connections are fully seated, and the station is set to accept solar input. Confirm panel voltage and connector compatibility against the manual. Stop if any rating is outside the allowed range.
Problem: A device will not run or the station shuts off.
Solution: Check the device’s wattage and startup demand against the station’s continuous and surge ratings. Disconnect other loads, select the correct output mode, and try again. If the station reports a fault, follow its manual before restarting.
Problem: Solar charging is slower than expected.
Solution: Move panels out of shade, aim them toward the sun, and inspect for dirt or loose connections. Compare the live input reading with expected conditions; clouds and low sun can sharply reduce output.
Problem: The station becomes hot or displays a temperature warning.
Solution: Turn off outputs and disconnect charging as the manual directs. Move the station to a dry, ventilated location within its operating temperature range and let it cool before use.
What Success Looks Like
The station accepts charge from its compatible panel, shows a rising battery level or solar input, and powers each intended device without overload or temperature warnings. The devices’ combined load stays within the station’s output limits, and the station remains dry and ventilated throughout use.
Next Steps
Record which devices you powered, how long they ran, and the battery percentage before and after use. Use those readings to refine future capacity and charging estimates. Before an emergency or trip, charge the station, inspect cables, and test the devices you expect to use. Follow the manufacturer’s schedule for storage checks and battery recharging.
Frequently Asked Questions
Can a solar-powered battery generator run a refrigerator?
Possibly. Check the refrigerator’s running watts, startup surge, and expected daily energy use, then compare them with the station’s continuous output, surge rating, and usable capacity. Small portable units may not run a full-size refrigerator for long.
How long does solar charging take?
It depends on battery capacity, panel wattage, sunlight, shade, panel angle, temperature, and charging limits. Use the station’s live input reading and battery display to estimate progress; rated panel output is not constant in ordinary conditions.
Can I use the station while its solar panel is charging it?
Many models support simultaneous charging and use, but behavior and output limits vary. Check the manual for pass-through charging support and keep the total device load within the station’s ratings.
Can I leave the station charging outdoors?
Only if the station and panel setup are protected within their stated weather and temperature limits. Most portable stations must stay dry; keep the unit ventilated and bring it under cover if rain or condensation is possible.