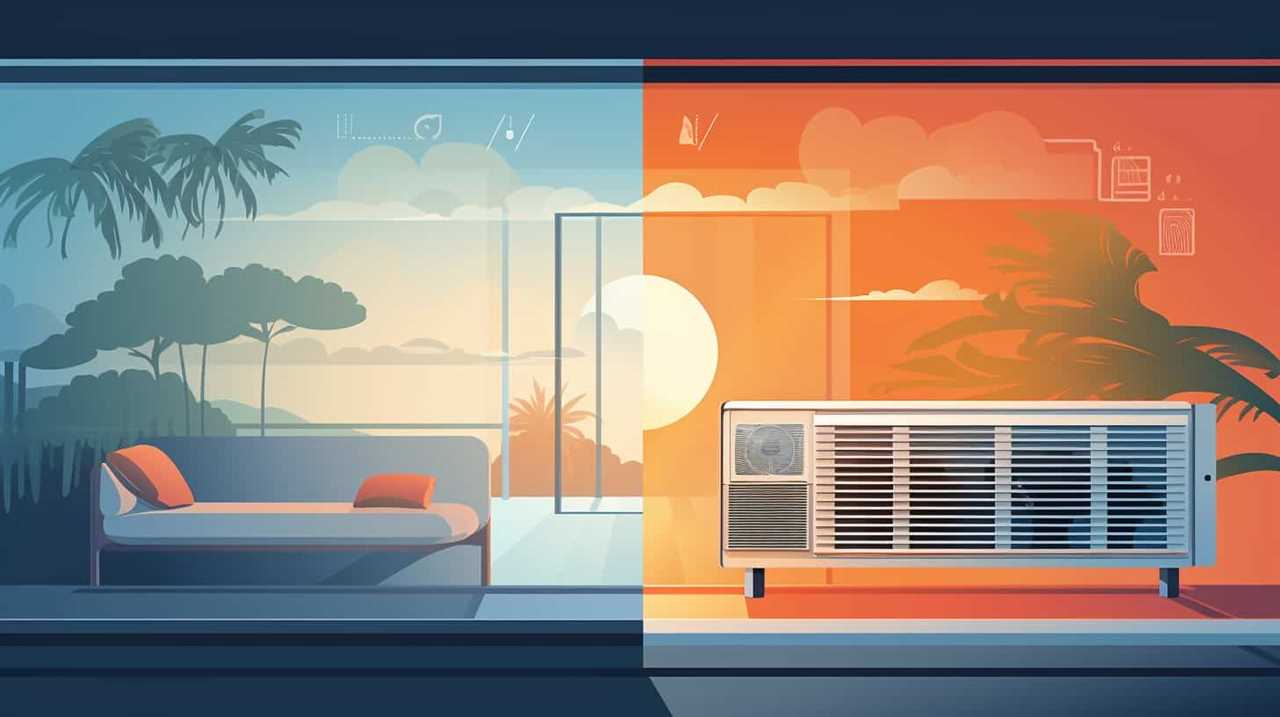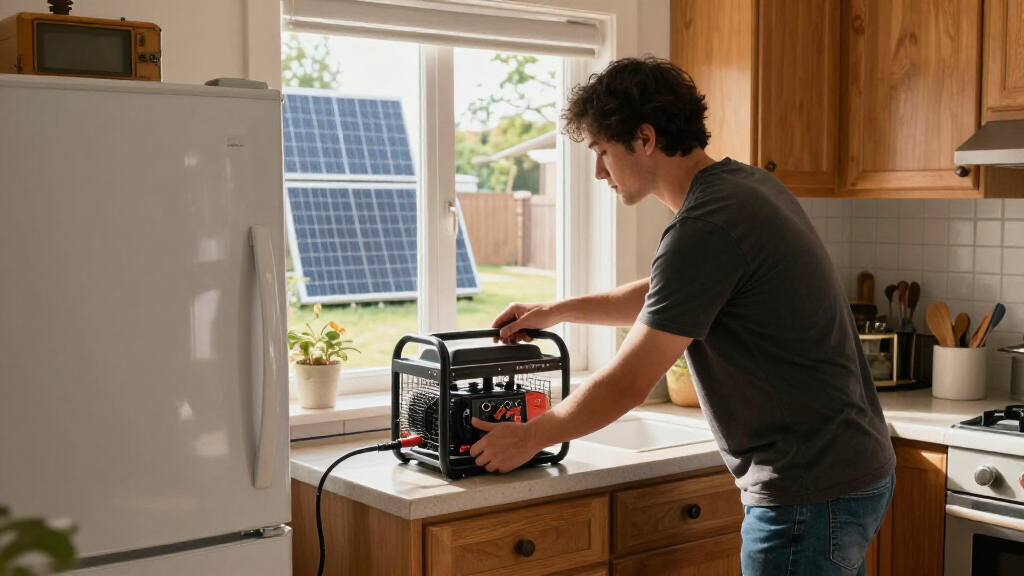
This guide helps you plan, set up, and test a solar backup power generator for essential devices during a power outage. It is intended for homeowners and renters who can use basic hand tools and read equipment labels; no electrical wiring is required for the portable setup described here. You will estimate your power needs, choose compatible equipment, connect solar panels and devices, and confirm the system performs as expected. Allow 2–4 hours for planning and testing a portable unit. A system wired into home circuits takes longer and must be installed by a licensed electrician.

Get backup power and energy gear delivered free — and shop member deals
- Fast, free delivery on millions of items
- Access to Prime Big Deal Days deals on October 6–7
- Prime Video, Amazon Music and more included
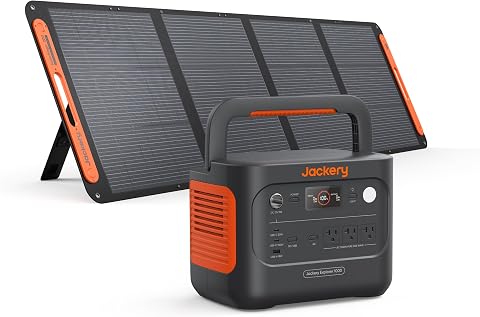
Jackery Solar Generator 1000 V2 with 200W Solar Panel
- ✔ Battery capacity: 1,070Wh
- ✔ Continuous AC output: 1,500W
- ✔ Surge power: 3,000W

Jackery Explorer 300 Portable Power Station, 292Wh
- ✔ Battery capacity: 292Wh
- ✔ Rated output: 300W
- ✔ Peak surge power: 600W

Portable Solar Generator 300W with 60W Solar Panel
- ✔ Power output: 300W
- ✔ Battery capacity: Not specified in the supplied product details
- ✔ Solar panel: 60W monocrystalline
Difficulty: Intermediate | Time: 2–4 hours for a portable setup; several days for a permanently installed system
What You’ll Need
Tools & Materials:
- Solar generator or power station with a built-in battery and inverter
- Compatible solar panels, cables, and connectors specified by the manufacturer
- Device labels or manuals showing watts and voltage
- Calculator or spreadsheet
- Notebook or phone for recording readings
- Optional: plug-in watt meter for measuring device consumption
Knowledge:
- Basic familiarity with plugging in household devices and reading product labels
- Understanding that watts measure power and watt-hours measure stored energy
Choose a dry, ventilated location for the power station, away from heat, rain, and standing water. Check the manuals for the unit and panels before connecting anything. Do not open the battery enclosure, modify connectors, or connect the unit to home wiring through a wall outlet. A home transfer switch or other circuit connection requires an electrician and equipment approved for that purpose.
Jackery Solar Generator 1000 V2 with 200W Solar Panel
For buyers who want one portable unit to cover more than phones and laptops, the Jackery Solar Generator 1000 V2 is the clearest fit in this group. Its 1,070Wh battery and 1,500W continuous AC output give it substantially more headroom than either 300W-class option. That matters when you need to support a broader mix of devices or an appliance whose running demand would exceed the smaller models’ stated output. The 3,000W surge rating also allows for brief startup demands, although it does not mean every appliance will be compatible; check both running and startup wattage before relying on it.The package includes a 200W solar panel, making this a more complete solar setup than the Explorer 300, which does not include a panel. Jackery specifies six hours to reach 80% with that panel, but actual charging depends on conditions and the spec is not a promise of the same result every day. For time-sensitive charging, the app-enabled emergency mode can reportedly fill the battery in one hour from AC. We see that as a useful contingency, not a reason to ignore the slower default mode, which is specified at 1.7 hours and is described as optimized for battery health.Its tradeoff is bulk: at 23.8 pounds, it is much less appealing for a long walk into camp than the 7.5-pound Explorer 300. The solar panel also requires separate handling, and emergency fast charging depends on enabling the app feature. Still, for portable outage readiness, it offers the strongest balance of battery, output, and included solar hardware here. Choose it over the smaller models for broader backup capability; skip it if your needs are limited to lightweight electronics or you expect to carry the system far.
Pros:
- Largest stated battery capacity in this comparison at 1,070Wh
- 1,500W continuous output and 3,000W surge rating offer more appliance headroom than the 300W-class alternatives
- Includes a 200W solar panel, unlike the Explorer 300
- LFP battery chemistry and multiple AC, USB, and DC connection types
Cons:
- At 23.8 pounds, it is the least convenient option to carry over distance
- The panel needs its own handling and solar results depend on conditions
- One-hour emergency charging requires enabling the app feature
Best for: Households seeking a portable power source for a wider range of essential devices and compatible appliances during short outages, with solar charging included.
Not ideal for: Buyers prioritizing minimal carry weight, whole-home backup, or a set-and-forget fast-charge mode that does not require app setup.
Bottom line: We rank the Jackery 1000 V2 first because its capacity, output, and included panel make it the most versatile portable backup option here, provided its weight fits your plans.
“We rank the Jackery 1000 V2 first because its capacity, output, and included panel make it the most versatile portable backup option here, provided its weight fits your plans.”
Jackery Explorer 300 Portable Power Station, 292Wh
When portability matters more than running appliances, the Jackery Explorer 300 makes a more practical carry than the 1000 V2. At 7.5 pounds, it is the lightest listed unit, and its 292Wh capacity is suited to topping up electronics such as phones, cameras, or a laptop rather than serving as a substantial household reserve. Its two AC outlets plus USB-C, USB-A, and car output make it useful for keeping several small devices connected, but multiple ports do not increase the energy available in the battery.That distinction is important for backup planning. Its 300W rated output is far below the Jackery 1000 V2’s 1,500W, so buyers should not assume it can run the same appliances simply because both products have AC outlets. The 600W surge figure is a peak rating, not sustained power. Compared with the 300W generator bundle, the Explorer’s appeal is its named LiFePO4 battery and over-4,000-cycle specification; however, it does not include a solar panel, so a solar-ready setup requires a compatible panel purchased separately.The Explorer 300 is a sensible pick for a grab-and-go emergency kit, a weekend campsite, or keeping small electronics alive through a brief interruption. It is not the better value in terms of backup capacity per trip if you need to power higher-demand equipment or run devices for a long stretch. For those needs, the 1000 V2’s larger reserve is the more capable choice, while the included-panel 300W bundle may be more convenient for someone who wants basic solar hardware in the box. Choose this Jackery when its low carry weight is the priority and you can live within its limited energy budget.
Pros:
- Lightest unit in this comparison at 7.5 pounds
- Several connection types, including USB-C PD and two AC outlets
- LiFePO4 chemistry with a stated cycle life of over 4,000 cycles
- Compact dimensions suit car kits and short trips
Cons:
- 292Wh capacity limits how long it can supply connected devices
- 300W rated output excludes many higher-demand appliances
- Solar panel is not included, unlike the other listed bundles
Best for: Campers and households wanting a lightweight reserve for phones, cameras, laptops, and other modest electronics.
Not ideal for: Anyone needing meaningful appliance backup, long runtimes, or a complete solar bundle without buying a separate panel.
Bottom line: We recommend the Explorer 300 for portable electronics backup, not for buyers who expect a compact station to perform like the higher-capacity Jackery 1000 V2.
“We recommend the Explorer 300 for portable electronics backup, not for buyers who expect a compact station to perform like the higher-capacity Jackery 1000 V2.”
Portable Solar Generator 300W with 60W Solar Panel
This 300W portable solar generator earns its spot by including a 60W foldable panel and offering AC, solar, and car charging options. For someone assembling a simple kit for phones, tablets, or small camping electronics, having a panel in the package reduces the number of separate components to source. Its several USB connections and built-in SOS flashlight also make it more oriented toward basic outdoor convenience than the Explorer 300, which is lighter but arrives without a solar panel.We would keep expectations firmly within the stated 300W output limit. It is not a substitute for the Jackery 1000 V2’s 1,500W output or 1,070Wh battery, and the provided description does not state a battery capacity in watt-hours. That missing capacity figure makes it harder to estimate runtimes against the Explorer 300, whose 292Wh reserve is specified. The 60W panel is also a modest charging source; the listed 20.5% conversion efficiency does not tell us how quickly the power station will recharge, so we would not treat it as a rapid outage-recovery solution.The unit’s non-waterproof junction box is a practical concern when placing the panel outdoors: keep that connection protected from rain and moisture. The product information also warns that performance may decline if it is not charged regularly, so it asks for more upkeep than a buyer may expect from emergency equipment stored away for months. Compared with the Explorer 300, it offers included solar hardware and a flashlight, but the Jackery has clearer battery specifications and a stated long-cycle LiFePO4 design. This is best viewed as a basic bundled option for light loads, not the most dependable choice for substantial backup.
Pros:
- Includes a 60W foldable monocrystalline solar panel
- Can recharge from AC, solar, or a car source
- Multiple USB and AC outlets plus an SOS flashlight
- Bundled accessories support a simple off-grid setup
Cons:
- 300W output limits it to low-demand devices
- Battery capacity in watt-hours is not provided in the supplied specifications
- Junction box is not waterproof and the unit requires regular charging
Best for: Occasional campers and buyers seeking a basic, panel-included kit for small electronics and low-demand devices.
Not ideal for: People planning to power appliances above 300W, leave equipment exposed to wet weather, or rely on clearly specified battery runtimes for outage planning.
Bottom line: We place this bundle third: it is convenient for basic solar-powered electronics, but its missing capacity figure and modest output make it less convincing for planned outage backup.
“We place this bundle third: it is convenient for basic solar-powered electronics, but its missing capacity figure and modest output make it less convincing for planned outage backup.”
As an Amazon Associate we earn from qualifying purchases.
Before You Start
Decide which loads you need during an outage, such as a phone, modem, lights, or refrigerator. A solar generator is not automatically powerful enough to run every home appliance. Check both the power station’s continuous output rating and its surge rating; motors in refrigerators and pumps may briefly draw much more power when starting. Keep the unit and battery within the temperature limits in the manual, and never charge a battery that is wet or damaged. If you smell burning, hear unusual noises, or see a swollen battery, stop using the equipment and contact the manufacturer.
Step-by-Step Instructions
Step 1: List the devices you need to power
Write down each essential device and its rated watts, using its label or manual. For devices with several operating modes, record the highest mode you expect to use. Estimate how many hours each device will run in a day. If a device lists amps instead of watts, multiply amps by volts to estimate watts; for example, 2 amps at 120 volts is 240 watts. Use a plug-in watt meter for appliances whose real use may differ from the label.
Tip: Separate must-have devices from optional ones. This makes it easier to reduce the load if the battery runs low.
Check: Your list shows the watts and planned daily run time for every device you intend to power.
Step 2: Calculate the power and energy you need
Estimate daily energy use by multiplying each device’s watts by its hours of use, then add the results. The answer is watt-hours per day. For example, a 10-watt light used for five hours needs about 50 watt-hours. Add a reserve of roughly 20–30 percent for conversion losses, changing conditions, and measurement uncertainty. Separately add the running watts of devices you may operate at the same time, and identify the largest motor-starting surge.
Tip: A refrigerator cycles on and off, so its daily energy use is not the same as running its full rated wattage all day. Use a watt meter or manufacturer energy estimate when possible.
Check: You have a daily watt-hour estimate, a simultaneous running-watt total, and a note of any starting surge.
Step 3: Select a compatible power station and panels
Choose a power station with usable battery capacity above your daily energy estimate and an inverter rated for your maximum simultaneous load and any required surge. Compare the unit’s output ports with your devices’ plugs and voltage requirements. Select panels that the manufacturer approves for the model. Confirm that the panels’ total open-circuit voltage and current stay within the station’s solar input limits, and that the connectors match without improvised adapters.
Tip: Check whether the battery can be expanded or charged from a vehicle or wall outlet if solar production is low. Do not assume a panel’s advertised wattage will be reached in every location or season.
Check: The station’s battery capacity, inverter output, solar input limits, ports, and panel connectors all match your plan and the manufacturers’ specifications.
Step 4: Inspect and prepare the equipment
Place the power station on a stable, dry surface with clear airflow around its vents. Inspect the battery case, panel glass, cables, and connectors for cracks, exposed wires, moisture, or damage. Read the startup instructions and find the controls for the main output and solar input. Fully charge the unit from a permitted source before an emergency, if its manual recommends this, and note the displayed battery level.
Tip: Keep cables away from walkways, sharp edges, hot surfaces, and places where doors or windows can pinch them. Do not use damaged equipment.
Check: The equipment is undamaged, the station is positioned safely, and you can identify its input and output controls.
Step 5: Set up the solar panels
Place the panels where they receive direct sunlight for the longest practical part of the day. Follow the panel manual for support, angle, spacing, and wind precautions. Keep panels clear of shade from trees, roof edges, or nearby objects; even partial shade can reduce output. Secure portable panels against wind and keep the power station protected from rain. Route the cable without creating a trip hazard.
Tip: Panel output changes with clouds, shade, temperature, and direction. Do not rely on a single brief reading to predict a full day of charging.
Check: The panels are stable, connected by an unobstructed cable route, and exposed to sunlight without unsafe placement.
Step 6: Connect the panels and confirm charging
With the solar input switched off if the manual directs, connect the panel cable to the station’s designated solar input. Use only the supplied or approved cables, and connect the panel and station in the order stated by their manuals. Turn on solar input and check the display for charging status and input watts. If the reading is zero, switch off the input before checking each connector and confirming sunlight.
Tip: Never exceed the solar input voltage or current limits, including when connecting panels in series or parallel. Follow the manufacturer’s wiring diagram rather than guessing from connector fit.
Check: The display indicates solar charging and shows a plausible input reading for the current light and conditions.
Step 7: Connect and test essential devices
Turn on the station’s appropriate output, then connect one device at a time. Check the display for output watts and watch for warning lights or overload messages. Test motor-driven equipment, such as a refrigerator, by itself first so its startup surge does not coincide with other loads. Run the system for at least 30 minutes, then compare the battery level and output reading with your estimates.
Tip: Use the station’s AC outlets for devices that require AC and its USB or DC ports where suitable. Avoid running a high-wattage appliance through a small extension cord; follow the appliance and station instructions.
Check: Each device operates normally, no overload warning appears, and the battery level declines at a rate consistent with the load.
Step 8: Record settings and prepare for an outage
Record the devices tested, their measured watts, the station’s starting charge, and how long the system operated. Note the panel placement and the best sunlight hours. Store the manuals and approved cables with the unit, and set a calendar reminder to inspect the battery level and equipment according to the manufacturer’s storage guidance. Make a simple load-priority list for use if charging cannot keep up with demand.
Tip: Test the setup again when seasons or the location change; shorter daylight hours can reduce daily charging substantially.
Check: You have written operating notes, know which loads to switch off first, and can locate the equipment and instructions quickly.
Common Mistakes to Avoid
- Choosing a unit based only on battery capacity and ignoring inverter output. — Check continuous watts and surge watts against the devices that may run together, especially appliances with motors.
- Assuming the panel’s advertised wattage will be available all day. — Plan for changing sunlight and shade, use measured charging readings as a guide, and keep a reserve in the battery estimate.
- Connecting panels with a voltage or connector arrangement the power station does not support. — Check the exact solar input limits and manufacturer-approved wiring and cables before connecting panels.
- Trying to power home circuits by plugging the generator into a wall outlet. — Use the station’s intended outlets for individual devices. Have a licensed electrician install an approved transfer switch or other home connection.
Troubleshooting
Problem: The power station shows no solar input.
Solution:
Switch off solar input before inspecting the connection. Confirm the panel is in direct sunlight, the connectors are fully seated, and the cable is approved for the unit. Check the panel voltage and connection arrangement against the input limits. If the display still shows no input, try a compatible panel or cable and contact the manufacturer rather than forcing a connector.
Problem: The station shuts down or reports an overload when an appliance starts.
Solution:
Disconnect the appliance and check its starting surge against the station’s surge rating. Start that appliance alone and unplug other loads. If it still trips the station, use a unit rated for the surge or choose a lower-power alternative; do not repeatedly reset an overloaded system.
Problem: The battery drains sooner than planned.
Solution:
Check the display for actual output watts and compare them with your estimates. Reduce device run time, turn off optional loads, and measure appliances with a watt meter if their consumption is unclear. Improve panel exposure to direct sunlight and verify that the station accepts the panel’s expected input.
Problem: The battery charges very slowly in daylight.
Solution:
Look for partial shade, dirty panel surfaces, loose connections, or a panel angle that limits direct sun. Check the station’s displayed input watts and the manual’s charging limits. Cloud cover and heat can lower output; move the panels to a clearer location when safe, and do not exceed the input rating to compensate.
What Success Looks Like
The setup is ready when the station charges from compatible panels, the display shows solar input, and each planned device runs without an overload warning. The measured load fits within the inverter’s continuous and surge ratings, and the battery capacity covers the planned use with a reserve. You also have a written priority list and know how to place the panels, check charging, and reduce loads. A system intended to feed household circuits is not ready until a licensed electrician has installed and tested the approved connection.
Next Steps
Store the equipment according to the battery manual, then check its charge and condition at the intervals the manufacturer specifies. Before severe weather, place the station where it can remain dry and ventilated, confirm that cables and panels are accessible, and charge the battery using an approved source. Repeat the device test after replacing equipment or changing the setup. If you want backup power on fixed home circuits, ask a licensed electrician to size and install a compatible transfer switch or other approved connection.
Frequently Asked Questions
How large a solar generator do I need for a refrigerator?
Use the refrigerator’s energy estimate or measure its consumption with a plug-in watt meter over a full day. Choose a battery with usable watt-hours above that daily use plus a reserve, and check that the inverter can handle the compressor’s starting surge. Model, age, room temperature, and door openings affect consumption, so a label alone may not predict runtime accurately.
Can I run a solar generator while it is charging?
Only if the manufacturer permits simultaneous charging and output for your model. Check the manual for pass-through operation and any limits on load or charging sources. Test the arrangement with a modest load before depending on it during an outage.
How many solar panels should I connect?
Base the panel array on your expected daily energy use and available sunlight, then stay within the power station’s solar input voltage, current, and wattage limits. A higher panel wattage does not help if it exceeds the input rating. Follow the manufacturer’s approved series or parallel configuration.
Can I connect a solar generator to my home electrical panel?
Do not connect it to a wall outlet or improvise a panel connection. Feeding power into home wiring requires an approved transfer switch or equivalent equipment installed by a licensed electrician. For a portable setup, plug individual devices directly into the power station.
Will the panels keep the battery charged overnight?
No. Panels produce power only when they receive sunlight. The battery supplies loads after dark, so estimate nighttime energy use and start the evening with enough stored capacity. Cloudy weather and short winter days can also limit the amount of energy available to recharge.
Halloween Picks
halloween
As an affiliate, we earn on qualifying purchases.