To vacuum and charge a system properly, start by preparing and calibrating your equipment, ensuring gauges and hoses are leak-free. Connect the vacuum pump and monitors, then evacuate the system until a deep, stable vacuum is achieved to remove air and moisture. Break the vacuum carefully, connect the refrigerant, and charge it accurately following manufacturer specs. Final checks confirm proper operation. Keep these steps in mind to ensure reliable system performance; more details await as you proceed.
Key Takeaways
- Ensure all gauges and tools are properly calibrated and connections are secure before starting the process.
- Evacuate the system using a vacuum pump until reaching the recommended deep vacuum, monitoring with a micron gauge.
- Perform leak detection during evacuation with soap bubbles or electronic detectors and fix any leaks immediately.
- Carefully open refrigerant supply, ensuring no air or moisture enters, and verify system integrity before charging.
- Document pressure readings, procedures, and observations for accurate system monitoring and future troubleshooting.

VIVOHOME 110V 1/3 HP 4CFM Single Stage Rotary Vane Air Vacuum Pump and R134a AC Manifold Gauge Set Kit with Leak Detector Carry Bag for HVAC Air Conditioning Refrigeration Recharging ETL Listed
HIGH-PERFORMANCE 4 CFM VACUUM PUMP: Single-stage rotary vane pump delivers fast, deep evacuation for automotive and home HVAC…
As an affiliate, we earn on qualifying purchases.
As an affiliate, we earn on qualifying purchases.
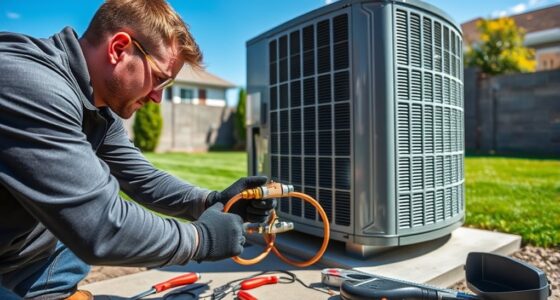
Preparing the Equipment and Workspace
Before beginning the vacuuming and charging procedures, you need to make sure your equipment and workspace are ready. Start by verifying that your vacuum pump and gauges are properly calibrated; accurate readings depend on well-calibrated equipment. Check for any leaks or damage to hoses and fittings to prevent issues later. Ensure your workspace is clean, well-lit, and free of clutter to promote safety and efficiency. Follow safety precautions, such as wearing protective gloves and goggles, to avoid injuries from refrigerants or equipment mishaps. Confirm that all necessary tools are within reach and functioning correctly. Proper preparation minimizes errors and keeps you safe throughout the process, setting a solid foundation for the subsequent steps. Additionally, understanding Real Couples can provide insights into teamwork and collaboration, which are essential skills during complex procedures.

49968 Charging Manifold and 4 Valve Test, A/C Manifold Gauge Tool Set, with 60" Hoses and 3/8" x 45° Compact Ball Valve Hose Set, Large Double Gauges, for Refrigerant Type R-22, R-404A, R-410A
DESCRIPTION: The 49968 4-valve test and charging manifold with hoses and ball valves come packed with great features….
As an affiliate, we earn on qualifying purchases.
As an affiliate, we earn on qualifying purchases.
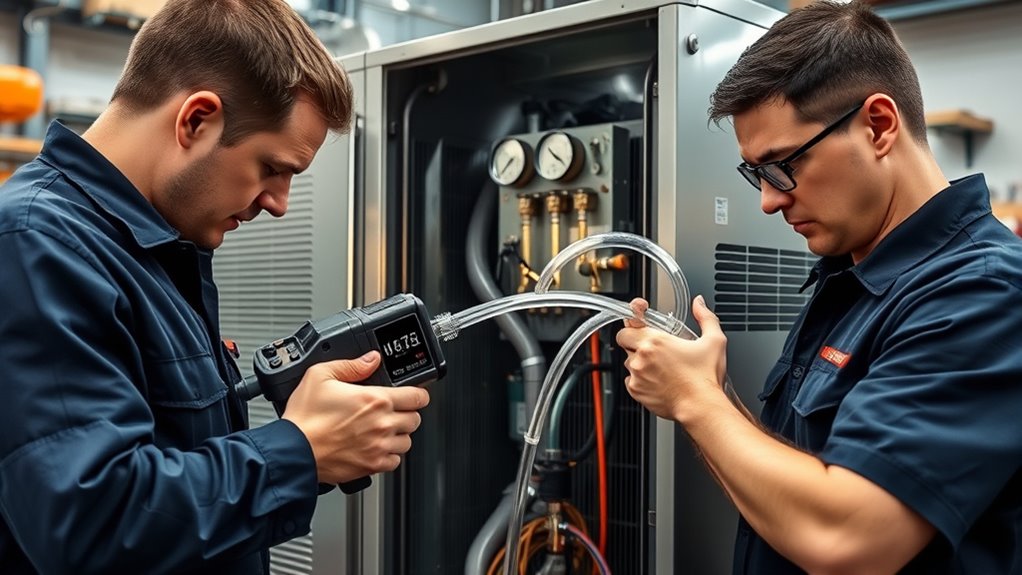
Connecting the Vacuum Pump and Gauges

To connect the vacuum pump and gauges correctly, start by attaching the hoses securely to the appropriate ports on the pump and gauges. Confirm all connections are tight to prevent leaks, which can compromise vacuum quality. Before use, inspect the hoses for cracks or damage, and perform routine vacuum pump maintenance to keep it operating efficiently. Proper gauge calibration is essential for accurate pressure readings; check calibration regularly according to manufacturer instructions. Once connected, verify that the gauges respond correctly when the pump is activated. Avoid overtightening fittings, which could damage threads. Properly connected hoses and calibrated gauges help you achieve reliable vacuum readings, ensuring the system is prepared for the evacuation process. Additionally, using properly maintained equipment minimizes the risk of malfunctions during the procedure.

CPS VG200 Digital Vacrometer Vacuum Gauge, Measures Microns, Millibar, TORR, Inches/HG, Two Button Operation, Automatic Temperature Compensation, 5-digit LCD Display, Padded Case, T-Fitting and Hook
SUPERIOR ACCURACY: Calibrated to strict NIST standards to ensure optimal precision and reliability during evacuation procedures, making it…
As an affiliate, we earn on qualifying purchases.
As an affiliate, we earn on qualifying purchases.
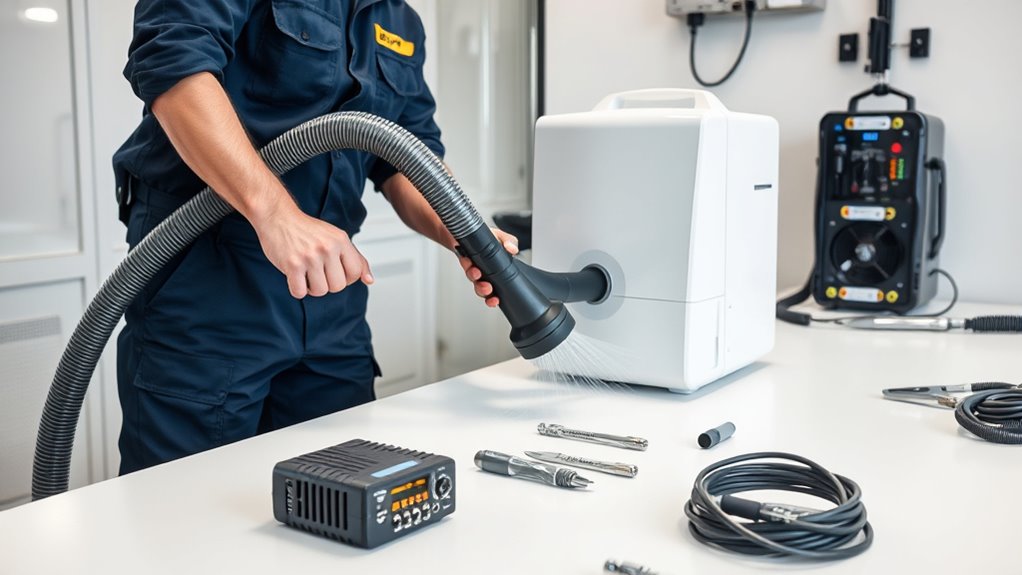
Evacuating the System Properly

Once the hoses are securely connected and gauges are calibrated, you can begin evacuating the system. Proper evacuation ensures no moisture or air remains, which can compromise performance. Focus on leak detection during this process to identify any weak points. To evacuate effectively:
Begin evacuating the system to remove moisture and air, ensuring leak-free operation.
- Start the pump and watch the gauges, aiming for a deep vacuum.
- Keep the vacuum running until pressure stabilizes, indicating leak-free conditions.
- Periodically check for leaks using the gauges or a leak detection method.
- Maintain the vacuum for the recommended time to ensure complete removal of moisture and air.
- A high-quality vacuum pump and accurate gauges are essential for achieving the optimal vacuum level.
This step is critical for vacuum maintenance and reliable system operation. Proper evacuation minimizes future issues, ensuring long-term efficiency and performance.

RectorSeal Better Bubble 65554 Advanced Leak Detector, Detects Refrigerant Gas, Air, and Oxygen, Fast Acting, Can Be Used at Varied Temperature/Pressure Conditions, Plumbing, 8 oz.
APPLICATION: Better Bubble is an advanced leak locator that can detect refrigerant gas, air, oxygen and most other…
As an affiliate, we earn on qualifying purchases.
As an affiliate, we earn on qualifying purchases.
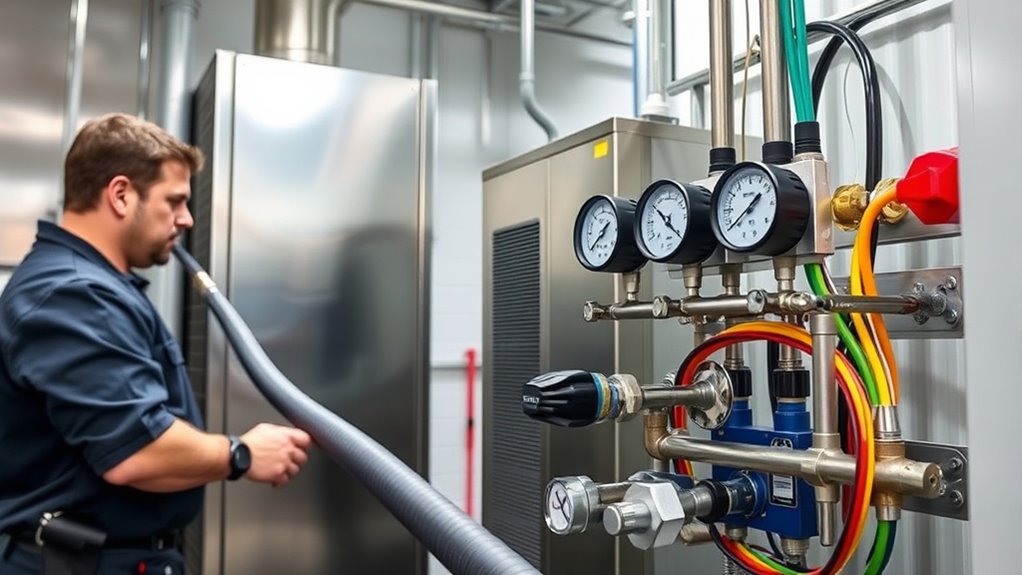
Monitoring Vacuum Levels and Ensuring Leak-Free Conditions

Monitoring vacuum levels closely is essential to confirm that the system has reached the proper deep vacuum and remains leak-free. Use a reliable micron gauge to check vacuum pressure regularly during the process. Consistent readings indicate that there are no leaks, and vacuum maintenance is effective. If the pressure rises or fluctuates, it signals potential leak detection issues, and you need to locate and fix the leak before proceeding. Maintaining an accurate record of vacuum levels helps verify system integrity over time. Always guarantee your connections are secure and that your equipment is functioning correctly. Proper leak detection and vigilant vacuum monitoring prevent future problems, ensuring the system stays sealed and operates efficiently. Regularly inspecting system components such as fittings and seals further helps prevent leaks and maintains optimal performance.
Breaking the Vacuum and Preparing for Charging
Before charging the system, you need to break the vacuum safely and efficiently. Maintaining vacuum integrity during this process is vital, as any contamination can compromise refrigerant compatibility. To guarantee success, follow these steps:
Ensure vacuum integrity during system charging to prevent contamination and maintain refrigerant compatibility.
- Rapidly close the vacuum pump valves to prevent air ingress.
- Use a manifold gauge set to monitor pressure and verify vacuum hold.
- Ensure all connections are secure and leak-free before opening service ports.
- Carefully open the refrigerant supply, avoiding air pockets or moisture entry.
- Regularly check for leaks and proper seal integrity throughout the process to maintain system performance.
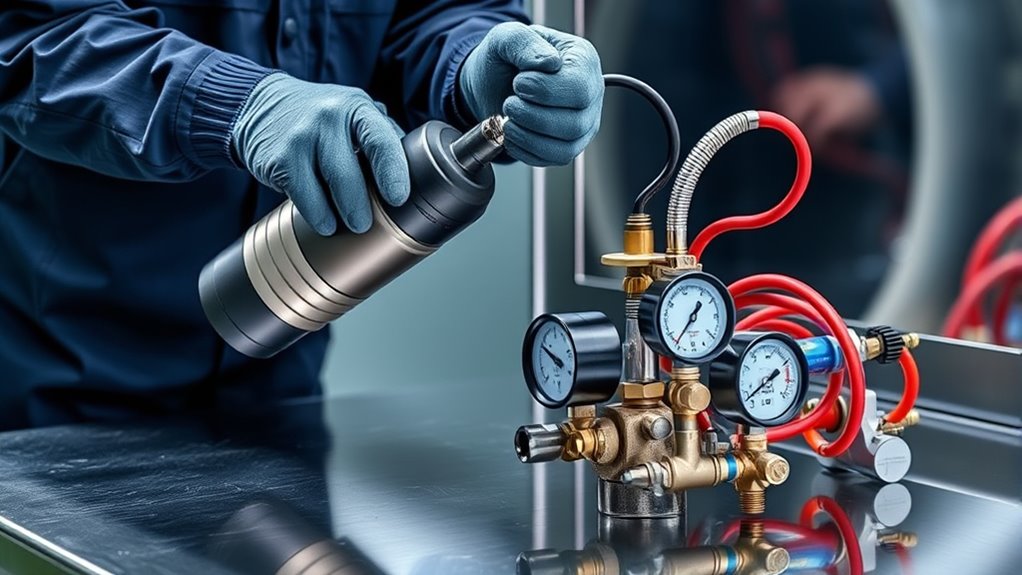
Selecting and Connecting the Correct Refrigerant Charge
After confirming the system is free of contaminants and vacuum integrity is maintained, the next step is to select and connect the correct refrigerant charge. First, verify refrigerant compatibility with the system’s specifications to prevent damage or inefficiency. Use appropriate charging equipment designed for the refrigerant type, such as manifold gauges and hoses, to ensure accurate measurement. Connect the charging lines securely, making sure all connections are tight to prevent leaks. Refer to the manufacturer’s specifications for the exact refrigerant amount required, and avoid overcharging or undercharging. Properly connecting the refrigerant ensures system performance and longevity, while also maintaining safety standards. Always double-check your equipment and refrigerant type before proceeding to the next step. Proper connection practices are essential for maintaining system efficiency and safety.
Charging the System With Refrigerant Safely and Accurately

To charge the system with refrigerant safely and accurately, you must follow proper procedures to prevent damage and guarantee ideal performance. Refrigerant safety is essential; mishandling can lead to injuries or system failure. Use correct charging techniques to ensure precise refrigerant levels, maximizing efficiency. Additionally, understanding the IRA investment strategy can help plan for potential tax implications on retirement savings, indirectly influencing long-term financial security. Here are key steps to follow: 1. Verify refrigerant type and amount** before charging to avoid overcharging or contamination. 2. Use proper personal protective equipment to prevent exposure during refrigerant handling. 3. Connect gauges and hoses securely to prevent leaks and ensure accurate readings. 4. Charge gradually, monitoring pressure and temperature**, to maintain system balance and avoid damage. Following these steps guarantees safe refrigerant safety practices and exemplary system performance.
Verifying System Performance and Pressure Readings
Verifying system performance and pressure readings is a crucial step to guarantee your installation operates efficiently and reliably. First, check the pressure gauge calibration to ensure accurate readings. Use leak detection methods such as soap bubbles or electronic detectors to find any refrigerant leaks. Monitoring the pressure readings helps confirm the system is sealed and operating within the manufacturer’s specifications. Visualize the process with this table:
| Step | Tool/Method | Purpose |
|---|---|---|
| Gauge calibration | Calibration device | Ensure accurate pressure readings |
| Pressure check | Pressure gauge | Confirm proper pressure levels |
| Leak detection | Soap bubbles/electronic detector | Identify leaks |
Accurate readings lead to ideal performance and long-term dependability. Incorporating industry best practices can further optimize your system’s efficiency and durability.
Documenting the Procedure and Final Checks

You need to record all the steps you followed during the procedure to guarantee proper documentation. Conduct a thorough final inspection to verify everything meets the required standards. This final check helps confirm the system is ready for operation and provides a clear record for future reference. Proper exfoliation can enhance the effectiveness of the system and prevent issues related to buildup or residue.
Recording Procedure Details
Recording detailed procedure steps and final checks is essential for guaranteeing consistency and accountability during installation. By documenting each step, you create a clear record of leak detection processes and safety precautions taken. This not only helps in troubleshooting but also demonstrates professionalism. Incorporating insights from the Best Vacuum Expert can help ensure that vacuuming and filtration are performed effectively to maintain system integrity. To do this effectively: 1. Detail every step you perform, including vacuuming and charging actions. 2. Note leak detection results** and any anomalies observed. 3. Record safety precautions followed during the process. 4. Verify and document final checks to confirm system integrity and safety. Accurate recordings ensure future reference, support quality assurance**, and help maintain high standards, giving clients confidence in your work. Proper documentation is key to safe, reliable, and consistent installations.
Conducting Final Inspection
Conducting a final inspection is a critical step to guarantee the entire installation meets safety and performance standards. During this process, you assess vacuum integrity by checking for leaks and ensuring the system holds the proper vacuum without loss. Confirm refrigerant compatibility by verifying the correct type and charge, making sure it matches manufacturer specifications. Inspect all connections for tightness, ensuring there are no leaks or loose fittings. Evaluate the compressor operation and verify that the system is free of debris or contaminants. Record all findings carefully, including pressure readings and any anomalies. This final check confirms that the system is properly vacuumed, refrigerant is compatible, and the installation is ready for operation, reducing the risk of future failures or safety issues.
Frequently Asked Questions
How Do I Identify Leaks During the Vacuuming Process?
During the vacuuming process, you can identify leaks by performing leak detection tests, such as using a pressure gauge or ultrasonic leak detector. Watch for a rise in pressure or loss of vacuum over time, which indicates compromised vacuum integrity. Make sure to verify all fittings, joints, and hoses thoroughly, as even small leaks can affect system performance. Consistent monitoring helps ensure your system remains leak-free and operates efficiently.
What Safety Precautions Are Necessary When Handling Refrigerants?
Did you know that improper handling of refrigerants can cause health risks and environmental damage? When handling refrigerants, prioritize safety by following handling guidelines closely. Always wear protective gear, work in well-ventilated areas, and avoid leaks. Proper refrigerant safety measures help prevent accidents and ensure compliance with regulations. Staying informed and cautious is key to safely managing refrigerants and protecting both yourself and the environment.
How Often Should Vacuum Pump Oil Be Changed?
You should change your vacuum pump oil regularly as part of proper vacuum pump maintenance, typically every 3 to 6 months, depending on usage and manufacturer recommendations. Regular oil changes guarantee efficient refrigerant recycling and prevent contamination that can compromise system performance. Keep an eye on oil color and consistency, and always follow the manufacturer’s guidelines for your specific pump to maintain peak operation and extend its lifespan.
Can I Reuse Recovered Refrigerant for Charging?
You can reuse recovered refrigerant for charging if it’s properly processed and meets purity standards. Always use recovery equipment that guarantees the refrigerant remains uncontaminated during recovery. Before reuse, verify refrigerant purity and compatibility with the system. Reusing refrigerant reduces waste and cost, but only do so when recovery equipment effectively prevents contamination, ensuring the refrigerant’s quality for ideal system performance.
What Are Common Signs of Improper Vacuum or Charging Errors?
Ever wondered why your system isn’t cooling properly? Signs of improper vacuum or charging errors include refrigerant contamination, which hampers efficiency, and compromised vacuum integrity, leading to leaks. You might notice uneven cooling, increased energy use, or strange noises. Always guarantee your vacuum is thorough and maintain proper charging procedures to prevent these issues. Ignoring these signs can cause long-term damage, so stay vigilant and verify your system’s vacuum and refrigerant quality regularly.
Conclusion
By mastering these procedures, you become the guardian of a system’s silent heartbeat. Each step you take is like tending to a delicate garden, ensuring it thrives in harmony. When you finish, you’ve not only sealed the system’s integrity but also fostered trust and safety. Your careful work is the seed that grows into reliable comfort, a quiet promise that warmth and coolness will always be there, blooming softly in every home.